In the world of bowling, getting the right fit between your hand and the ball is essential. Those finger holes, of course, aren’t just there for design – they’re the key to control, precision, and that flawless release.
Have you ever wondered how those finger holes are expertly drilled into a bowling ball? Join us as we take a journey into the precision art of drilling finger holes. Don’t worry, we won’t get too bogged down in technical details and will instead focus on the parts of the process that any serious bowler should know.
Crafting the Connection Between Bowler and Ball
First, you may not be completely aware of all the reasons why getting your own bowling ball is necessary if you want to bowl seriously. House balls can be great (and economical!) when you’re just getting started, but eventually you want to make sure you have something custom to you. Read this article for more.
- Pre-Drilling Assessment
Before the drilling process even begins, your bowling ball undergoes an assessment to determine the optimal layout for finger hole placement. Factors like your span (the distance between the holes), pitch (the angle of the holes), and hole size are carefully considered. This step ensures that the ball will comfortably match your hand’s shape and movements.
- Choosing the Layout
The layout of the finger holes greatly affects the ball’s roll and your overall performance. Your ball driller will work with you to select a layout that complements your playing style. Whether you plan to bowl with a conventional or fingertip grip, or if you’re a two-handed power player versus a classic one-handed bowler, the layout will be tailored to enhance your control and accuracy.
- Precision Drilling
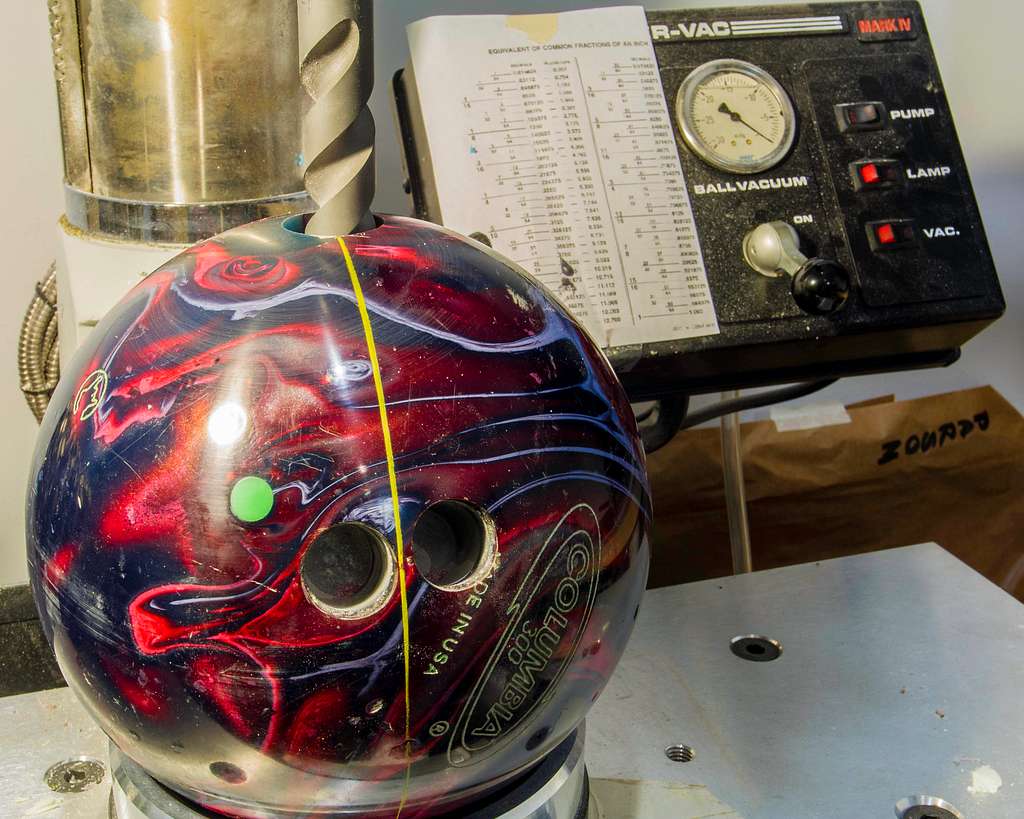
Once the layout is decided, the drilling process begins. Specialized drilling equipment is used to create the finger holes. Modern drills are often computer-controlled, ensuring accuracy. The measurements and angles specified in the layout are programmed into the machine, which then drills the holes with incredible precision.
- Custom Fit
Each finger hole is crafted to match your finger’s size and shape. The goal is to create a snug fit that allows for a secure grip without straining your hand. You’ll place your fingers in the holes, and the driller may make slight adjustments to ensure the fit is just right. Remember, a comfortable grip translates to better control over the ball’s trajectory.
- Fine-Tuning and Testing
After the initial drilling, you’ll likely take a few practice shots to assess how the ball feels. If any discomfort or imbalance is detected, adjustments can be made. These could include changing the pitch of the holes or altering the span slightly. It’s all about fine-tuning until you have that perfect connection between your hand and the ball.
- Coverstock Protection
Drilling the finger holes exposes the inner core of the bowling ball. To protect the exposed area and maintain the ball’s integrity, a process called “plugging” is performed. This involves filling the holes with a material that matches the ball’s core, creating a seamless surface.
- Etching and Personalization
While not directly related to the drilling process, this is the stage where your ball’s surface might be etched with your name, a design, or other personalization. It’s the finishing touch that makes the ball uniquely yours.
In conclusion, the process of drilling finger holes in a bowling ball is a combination of art and science. It’s about achieving that perfect harmony between your hand and the ball, maximizing your control and accuracy on the lanes. So, next time you grip your bowling ball, take a moment to appreciate the meticulous craftsmanship that goes into crafting this vital connection.
Finally, now that you know the details on drilling, you may be wondering what ball you should be getting. Read our article on the best bowling balls to help you decide.
Keep rolling those strikes with your perfectly-fitted bowling ball!
<!–
–>